Sunday 17 November 2019

Hummingbird Cake


My absolute favourite bakery in the world is the Hummingbird Bakery. If you're a London resident and have never had the pleasure, then get your tushy to the nearest one! I would highly recommend you start with their 'black bottom cupcakes'!

I've been dying to make this cake for a wee while now and it did not disappoint! I did made a few adjustments - purely because of what I already had in my cupboards/forgot to pick up from the supermarket...!  

I used dark brown sugar instead of caster which gave it a glorious caramel flavour and added in a few extra wintery spices because I loooooooooooove spice (and wanted my house to smell like Christmas - let's face it, this was the main reason....).

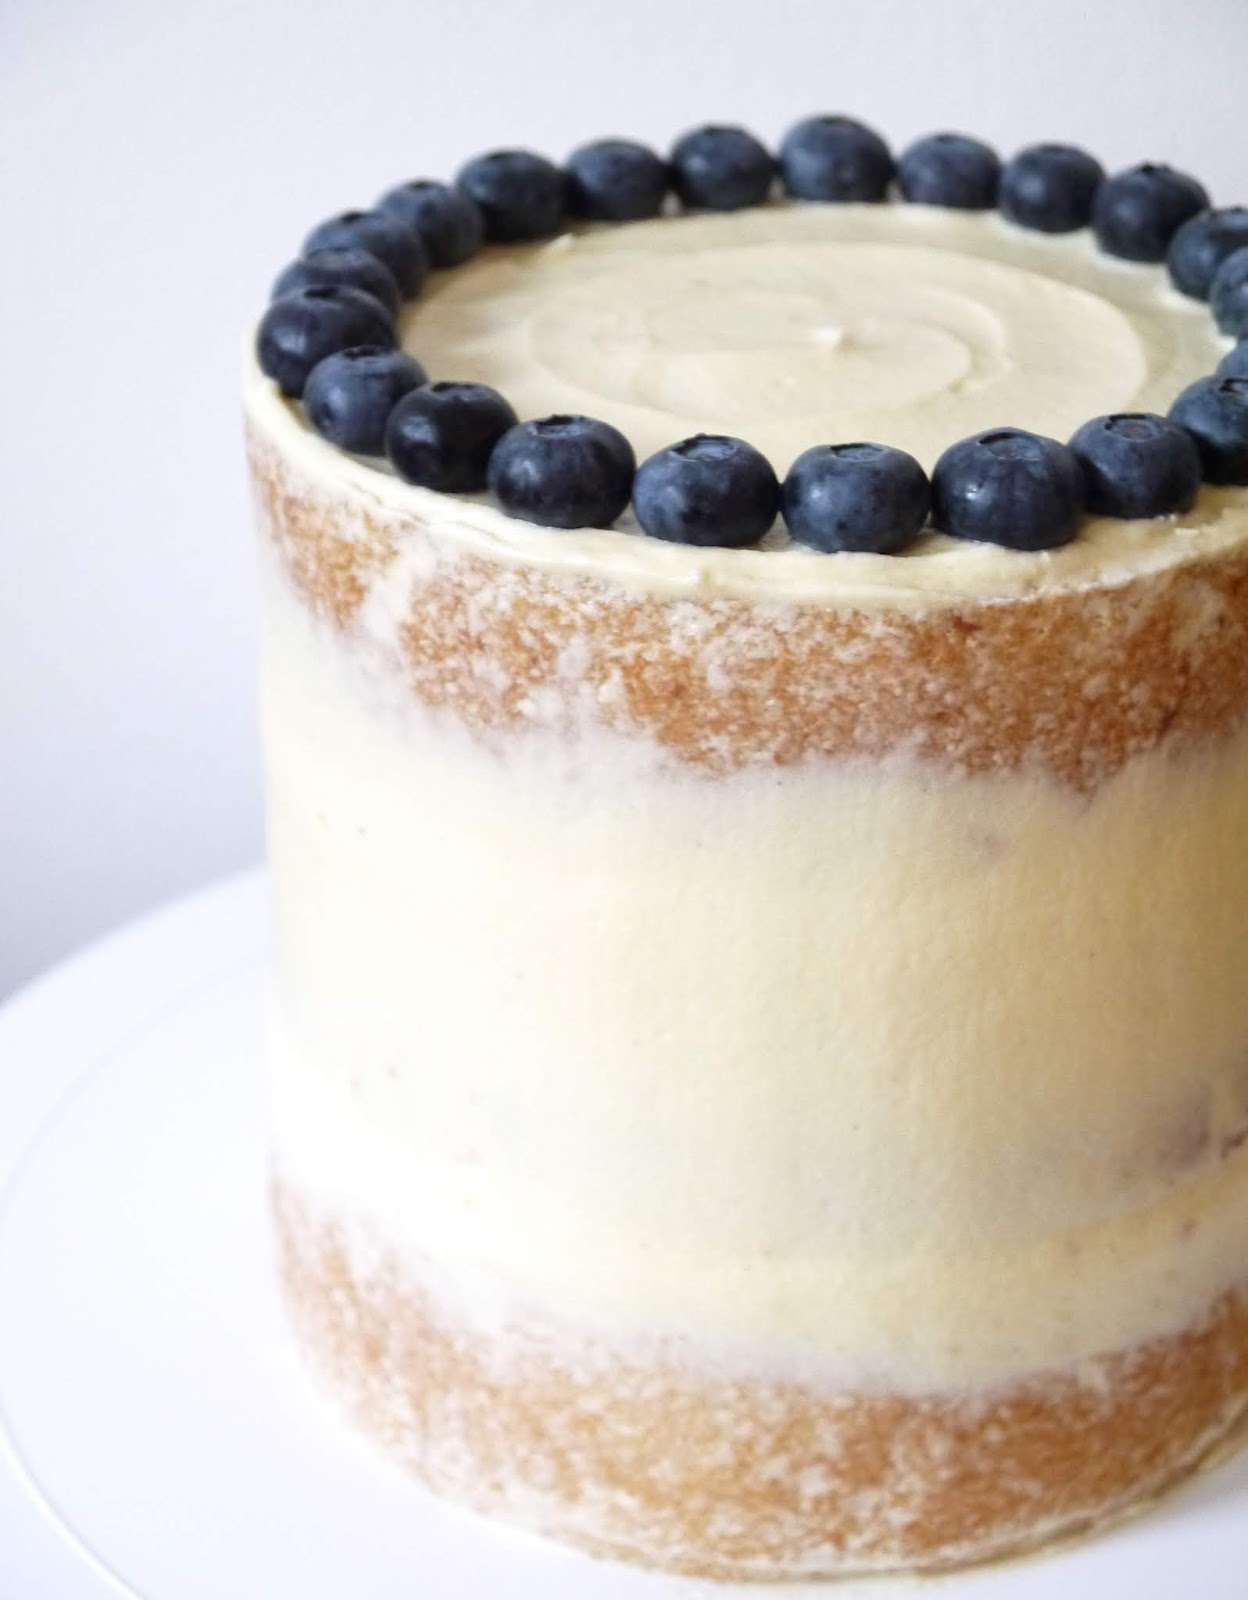
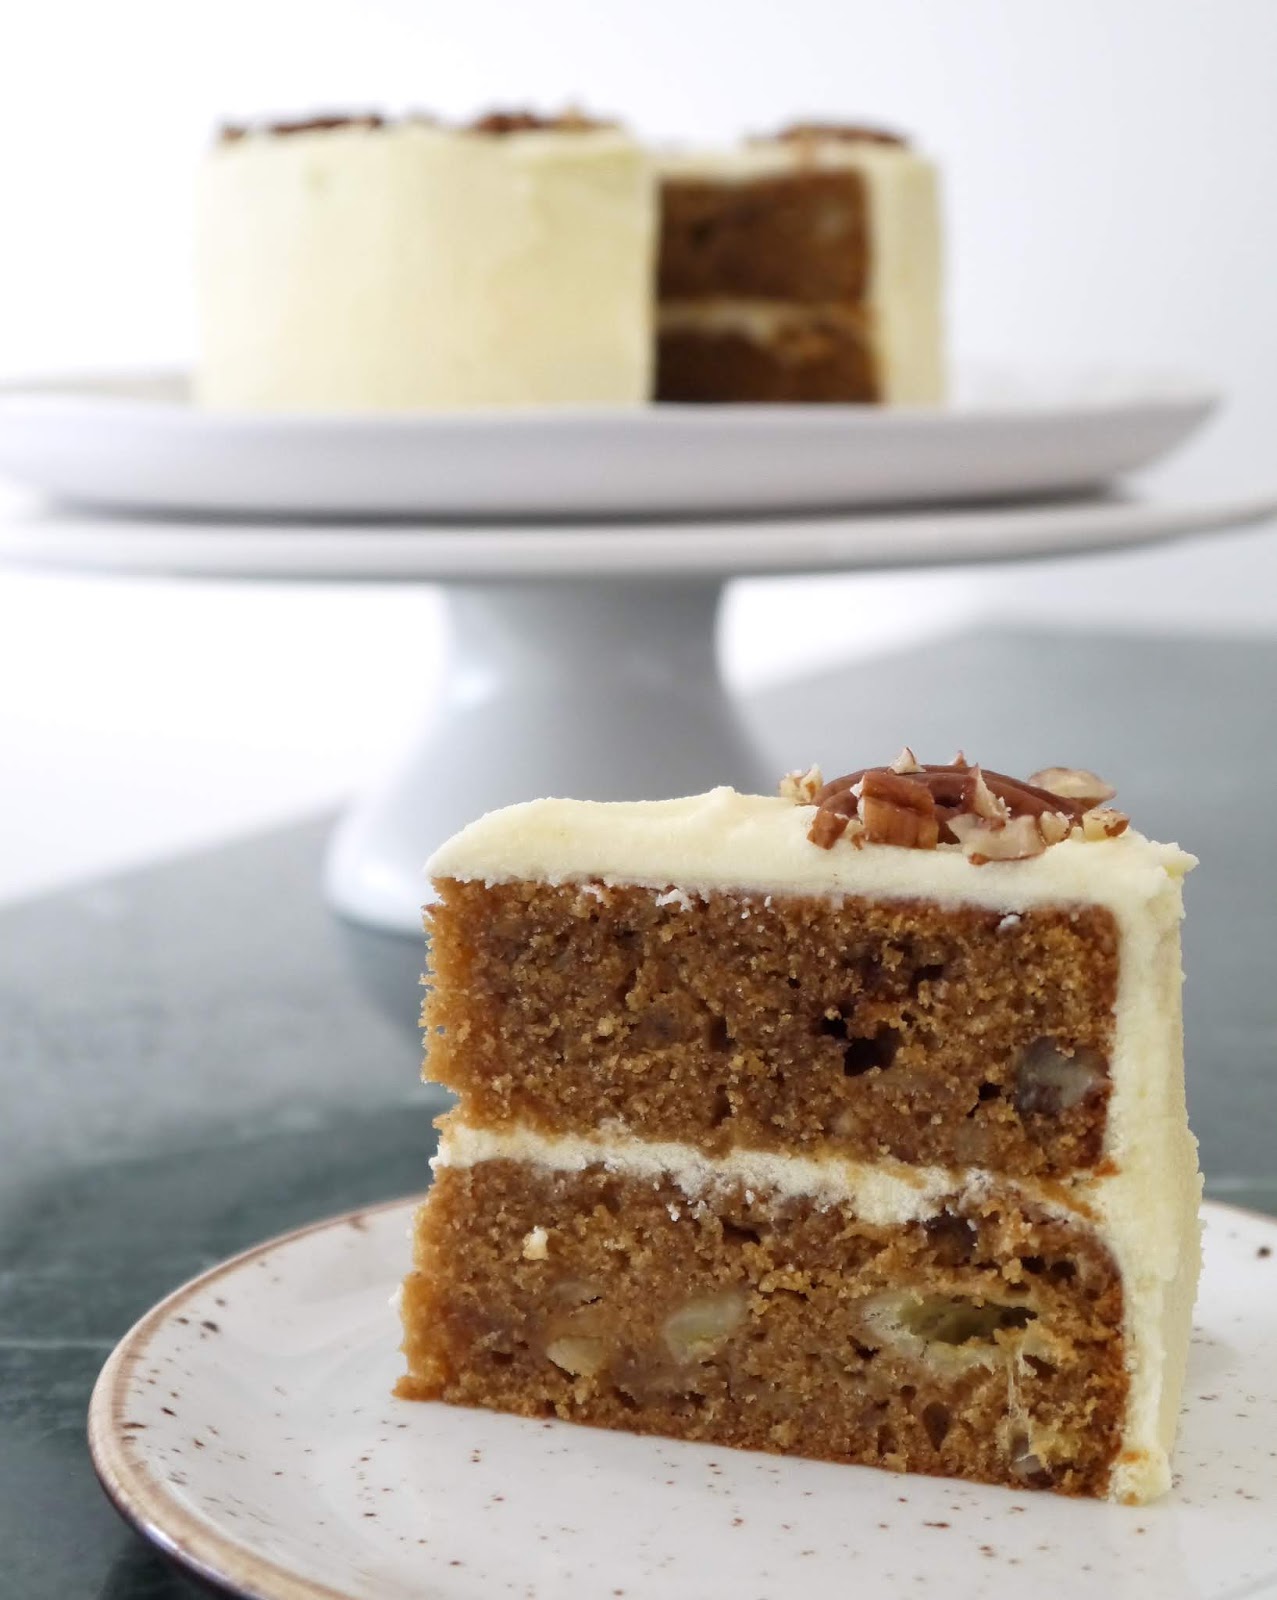
This recipe makes a magnificent 3 tier cake, smothered in cream cheese frosting with a cinnamon spiced sponge packed full of pecans and fruit.
(Don't be deceived by the pictures, I made one 2 tier cake and a separate 1 tier cake - one for a friend's birthday and one for me and Will to eat in the meantime!)

Enjoy baking buddies!


What you'll need//

3 medium eggs
300g soft dark brown sugar
300ml sunflower oil
250g ripe bananas (mashed)
pinch of salt
couple drops of vanilla extract
100g tinned pineapple
100g roughly chopped pecans
2 tsp cinnamon
1 tsp ground ginger
half tsp nutmeg
300g plain flour
1 tsp bicarbonate of soda

125g unsalted butter (room temp)
125g cream cheese (cold)
250g icing sugar

x3 6 inch baking tins greased and lined (I use these)


What to do//

Preheat your oven to 170 degrees C (fan) and grease and line your baking tins. 

Roughly chop your pineapple into small pieces. Chop your pecans, leaving about 12 for decoration.

Mash your bananas with the back of a fork.

In a large mixing bowl whisk your eggs and mix in the sugar, sunflower oil, mashed bananas, salt, vanilla, chopped pineapple and pecans. Mix well.

In a separate bowl, mix together your cinnamon, ginger, nutmeg, flour and bicarbonate of soda before sifting into your main mixture. Stir until the flour has just disappeared. Do not over mix!

Pour equally into your lined baking tins and bake for 25-30 mins. 

Leave to cool in the tins for 10 minutes before transferring to a wire rack to cool completely. 

To make the frosting - beat the butter for a couple of minutes using an electric hand mixer or cake mixer if you have one. Sift in the icing sugar 125g at a time and mix for a couple of minutes. Add the cream cheese and mix for a further 3-4 minutes. Refrigerate until your cakes are cool enough to frost.

Use half of the frosting for between the tiers and half for the outside of the cake. Decorate with pecans :)

Enjoy with a steamy mug of tea and your buddies!


What are your favourite Hummingbird cakes/cupcakes?

Betty x

PS. Are we friends on Instagram? Pop over and say hello!

If you missed my White Chocolate and Cranberry Flapjack then take a peak here
Share:

Wednesday 25 September 2019

White Chocolate and Cranberry Flapjack

The Best White Chocolate and Cranberry Flapjack Recipe The Betty Stamp

I LOVE FLAPJACK!

Some of my earliest memories as a nipper are coffee dates (Ribena for me) with my mum in the local cafe, 'Peppers', munching on a sticky flapjack, colouring book in tow.

They somehow made it the most perfect consistency. If I close my eyes I can taste it now, it was such a good'un! Ever so slightly chewy around the edges and deliciously syrupy in the middle.

I believe I came pretty close with this recipe!

Don't tell.... but I snaffled some little pots of maple flavoured golden syrup from a hotel brekkie buffet because.....maple syrup flavoured golden syrup....where on earth am I going to find that again?!

(Actually I just found it on the web...oops)

Anyway, they were staring me in the face and I'd taken some extra for my pancakes anyway. (That's my excuse and I'm sticking to it!)

Back to the flapjack......I advise you to bake some because THEY'RE SERIOUSLY SCRUMMY!


The Best White Chocolate and Cranberry Flapjack Recipe The Betty Stamp


Yes that is a massive prune that must have snuck it's way into my dried fruit selection!


What you'll need//

150g unsalted butter
4 tbsp maple flavour golden syrup! (Or normal golden syrup if you CBA to order any)
150g light brown sugar
320g oats
100g dried cranberries (or mixed dried fruit)
100g white chocolate

20x20cm square tin or equivalent


The Best White Chocolate and Cranberry Flapjack Recipe The Betty Stamp


What to do//

Preheat your oven to 160 degrees (fan) and line a 20 x 20cm square tin.

Place a large saucepan onto a low heat and melt your butter, syrup and sugar. Stir for a couple of minutes until the sugar has dissolved.

Remove the pan from the heat and thoroughly stir in your oats and cranberries, (leaving a few to sprinkle on top), until they're all covered in syrupy yumminess :)

Pour into your prepared tin and press down hard with the back of a tablespoon so the mixture is even and well compressed.

Bake for 25 minutes and leave it to cool completely.

Melt your white chocolate, drizzle over your flapjack and sprinkle on the remaining cranberries.

Refrigerate for a couple of hours to help it solidify. Or if you can't wait that long, just tuck in!


The Best White Chocolate and Cranberry Flapjack Recipe The Betty Stamp


I hope you enjoy this recipe! I can't to make/eat it again myself :)

Betty x

Ps. For something a little healthier with just as much deliciousness, try my Zero Baddies Strawberry and Chocolate Chip Cookies!


Share:

Tuesday 10 September 2019

ZERO BADDIES Chocolate Chip, PB & Strawberry Oaty Cookies


You lovely guys & gals seem to love my Zero Baddies PB Chocolate Chunk Cookies! (I'm not surprised because they're my fave too...maybe it translates over t'interweb!)

So this, combined with my summer obsession with strawberries left me with a mini creative craving to conjure up a recipe for you (and me) that feels naughty to nibble on, without any of the cookie guilt!

So purrlleease enjoy and bake to your hearts content these super easy to make, guilt free, refined sugar free, gluten free (using GF oats) and dairy free (using DF chocolate), Strawberry Chocolate Chip Cookies!


What you'll need//

3 medium, very ripe bananas
2 tbsp peanut butter
4 tbsp maple syrup
2 cups oats
1 tsp cinnamon
half tsp baking powder
few drops of vanilla extract
50g dark choc chunks
6 strawberries (chopped)
Optional: 50g milk choc chips (omit if you want to keep these totally guilt free!)


What to do//

Preheat your oven to 180 degrees C (fan) and line two baking trays with greaseproof paper.

Mash your banana in a mixing bowl and stir in all of your wet ingredients.

Leaving aside a few chocolate chips and strawberry pieces for the tops of the cookies, add everything else into the mixing bowl and combine.

Using an ice cream scoop of tablespoon, make little cookie size blobs and place them onto your baking trays (don't flatten them out). Place your extra treats on top.

Bake for 15-18 minutes.

Leave to cool (I burnt my tongue through impatience) before devouring, guiltlessly!


Share:

Saturday 20 July 2019

Elderflower & Lemon Drizzle Cake


This sweet and tangy drizzle cake combines two of my absolute favourite Summer flavours - lemon and elderflower.

As I was heading to a Cake & Yoga club on Sunday morning, I thought I'd tweak my favourite lemon drizzle recipe, turning it into more of a traybake and adding a hint of elderflower cordial to give that extra touch of sweetness and zing!

It's a super quick and easy bake to whip up, whether you're heading to a friend's bbq or simply want to bake something sweet to munch on throughout the week, it's definitely one of my go-to's.

I had some scrummy strawberries that needed eating up, so decorated using some of these and made candied lemon slices as well which, I'm not going to lie, weren't my favourite things on the planet. So I'd advise sticking to a generous coating of drizzle and strawberry slices to add even more summery freshness!


Equipment: 8x8 square baking tin
Prep time: 5 minutes
Baking time: 35-40 minutes
Makes: approx 12 portions

What you'll need//

150g caster sugar
150g unsalted butter
3 medium eggs
1 tbsp poppy seeds
zest of 2 lemons
1 tbsp elderflower cordial
175g self raising flour
1 tsp baking powder

For the drizzle//

juice of 1.5 lemons
2 tbsp elderflower cordial
100g caster sugar


Optional: strawberries for decoration
For those interested in making candied lemon slices, I followed this recipe


What to do//

Preheat the oven to 170 degrees C (fan) and line an 8x8 baking tin with greaseproof paper.

Cream together your butter and sugar.

In a separate bowl, whisk your eggs (to avoid any rogue shell in your actual mixture!) and stir into the butter mixture along with your poppy seeds, finely grated lemon zest and elderflower cordial.

Sift in your flour and baking powder and stir until just combined. Don't overmix as it might cause your sponge to be a bit dry.

Pour the mixture into your lined baking tin and bake for 35-40 minutes, after which a cocktail stick should come out clean.

Make your drizzle by combining the sugar, lemon juice and elderflower cordial. Add more or less liquid depending on how thick/thin you prefer your drizzle.

Whilst the sponge is still warm, poke holes into the top using a cocktail stick or fork and pour over generous spoonfuls of your drizzle.

Decorate with strawberries or candied lemon slices and leave to cool before devouring several slices with a steamy hot drink :)


Enjoy baking buddies!

Are any of you baking this weekend? If so, what are you making?

Betty x

Ps. Did you see my Oreo Brownie recipe? It's become a firm favourite in our household!

Share:

Friday 24 May 2019

Fudgey Oreo Brownies!

The Best Oreo Brownie Recipe The Betty Stamp

Wowoweeewah!

I've hit the absolute brownie jackpot with these seriously naughty, chocolate-stuffed, fudgey Oreo brownies.

*WARNING* Own trumpet about to be blown...

I'm going to go there and say that these little monsters are by far the most scrumdiddlyumptious brownies I've ever tasted.

*Puts trumpet down*

I whipped up a batch for my flatmate's birthday as she's an avid Oreo fan, and loved them so much that I baked another tray-full for my sister-in-law, mainly so I could snaffle a few for myself!

They're seriously quick and easy to make - prepped and out of the oven within an hour. Although you might have to wait for them to cool before you sneak a nibble, as that centre is MOLTEN (as I found out by being impatient...)

SO, onto the good stuff...


The Best Oreo Brownie Recipe The Betty Stamp

The Best Oreo Brownie Recipe The Betty Stamp


Makes: 16 brownies
Prep time: 10 mins
Baking time: 45 mins

What you'll need//

150g unsalted butter
300g caster sugar
2 tbsp golden syrup
2 tsp vanilla bean paste/extract
200g dark chocolate
180g plain flour
3 eggs
1 packet of oreos

20 x 20cm tin


The Best Oreo Brownie Recipe The Betty Stamp

The Best Oreo Brownie Recipe The Betty Stamp


What to do//

Preheat oven to 180 degrees C (fan) and line a 20 x 20cm baking tin with greaseproof paper. 

Melt your butter in a large saucepan on a LOW heat. Add the sugar and stir for 2 minutes. 

Add your golden syrup, chopped chocolate and vanilla and continuously stir until all the chocolate is melted. Remove from the heat.

In a separate bowl, whisk your eggs. 

Sift your flour into the chocolate mixture and add the eggs. Stir until all the flour has disappeared and the eggs are well combined into the mixture.

Pour the mixture into your lined baking tin, spreading evenly. 

Twist your Oreos into halves and place them in perfect little lines :)

Bake for 45 minutes. 

Leave to cool completely - as I said...that centre is MOLTEN!!!


The Best Oreo Brownie Recipe The Betty Stamp


Enjoy baking buddies! And have a LOVELY weekend wherever you are :)

Betty x 

PS, are we Instabuddies? Come say hi and make my day!

If you're a chocolate-lurrrver, did you see my Heavenly Honeycomb Chocolate Cake recipe?
Share:

Saturday 11 May 2019

Bread Ahead // Doughnut Workshop

The Bread Ahead Bakery Doughnut Workshop The Betty Stamp

Question: Any Londoners out there spent much time drooling over that doughnut stall at Borough Market? The one that sells those custard-stuffed doughnuts with pieces of honeycomb nestled into the top? The one that always has a queue about 20 people long?

Well turns out they do a doughnut workshop!

Uh huh! You heard correctly - DOUGHNUT WORKSHOP! And I'm afraid to say, if you haven't immediately typed 'doughnut workshop' into your search engine then I'm not sure we can be friends ;)

William really kindly bought his mum and I a gift voucher for one of the Bread Ahead workshops for Christmas and after having a browse through their extensive list, from Scandinavian to Best of British, we ended up picking their most popular course - DOUGHNUTS!

Having eyed up and drooled over these specific custard-stuffed doughnuts at Borough Market a million times before, it's safe to say, we both were very keen on this particular one.


That's my 'mmm, liquid sugar' face...

I'm not even ashamed to say, I was 'that' person who, as soon as the lovely lady asked for volunteers, my hand shot straight up. So here's me being an absolute keeno learning how to make HONEYCOMB for the topping for our doughnuts. 

Turns out, I didn't actually want to know just how much sugar goes into honeycomb... as it's now ruined my Crunchie-eating experience forever!


The Bread Ahead Bakery Doughnut Workshop The Betty Stamp

The Bread Ahead Bakery Doughnut Workshop The Betty Stamp


IT'S ALIVE!


The Bread Ahead Bakery Doughnut Workshop The Betty Stamp


The Bread Ahead Bakery Doughnut Workshop The Betty Stamp


The Bread Ahead Bakery Doughnut Workshop The Betty Stamp


'The bubbles, the bubbles, the bubbles.' - Finding Nemo.


The Bread Ahead Bakery Doughnut Workshop The Betty Stamp


We had an absolute blast. It was just the right length of workshop; a half day from 10-1pm and we came away with sugar all around our lips, no appetite for lunch and a brain full of knowledge about doughnut dough :) Brilliant.

I'd highly recommend to anyone.

I have to say though, my favourite part was bashing the honeycomb to smithereens :)


The Bread Ahead Bakery Doughnut Workshop The Betty Stamp

The Bread Ahead Bakery Doughnut Workshop The Betty Stamp

The Bread Ahead Bakery Doughnut Workshop The Betty Stamp

The Bread Ahead Bakery Doughnut Workshop The Betty Stamp


My photos were a bit dodge so apologies for that, I only had my phone and to be honest, was too distracted licking my fingers and munching on honeycomb to get high quality shots! But I hope this gives you a good idea anyhow.

I ended up baking a mammoth Honeycomb Chocolate Cake with my goody bag of honeycomb from the workshop so check it out!

Enjoy your weekend whatever you're up to!

Betty x

Ps Are we Insta-friends? Pop on over and say hi! It would make my day.
Share:

Tuesday 30 April 2019

Heavenly Honeycomb Chocolate Cake

The Betty Stamp The Best Honeycomb Chocolate Cake Crunchie Recipe

When the going gets tough...eat chocolate cake.

No 'goings' have been getting tough for me lately though...I just want to eat the chocolate cake.

There is nothing healthy about this cake, apart from the strawberries in the strawberry jam and the honey in the honeycomb...

OK, I'm scraping the barrel there.

I'll return to my original statement that, there is nothing healthy about this cake.

Calorie counters avert your eyes!

OR have a day off, grab yourself a good book, a cup of tea and a generous slice of chocolatey dreaminess and treat yourself!

Have a Bruce Bogtrotter moment :)


The Betty Stamp The Best Honeycomb Chocolate Cake Crunchie Recipe


What you'll need //

x2 6 inch round tins. I use these

250g plain flour
40g cocoa powder
1 tsp baking powder
half tsp bicarbonate of soda
pinch of salt
250g caster sugar
180ml vegetable oil
3 eggs
half tsp vanilla bean paste or extract
3 tbsp buttermilk
8 tbsp hot water (not boiling)


For the frosting//
200g unsalted butter (room temp)
300g icing sugar
60g cocoa powder
1 tsp vanilla bean paste or extract
12 tbsp whipping cream

Your own choice of jam :) I used strawb

Honeycomb pieces or Crunchie!


The Betty Stamp The Best Honeycomb Chocolate Cake Crunchie Recipe


What to do//

Preheat your oven to 160 degrees C (fan) and line x2 6 inch round tins with greaseproof paper.

Into a large mixing bowl, sift your flour, cocoa powder, baking powder and bicarb. Add the pinch of salt and mix together.

Into a separate bowl mix together your caster sugar, oil, whisked eggs, vanilla and buttermilk.

Pour the liquid mixture into the dry mixture and add the hot water. Mix until all the flour has just disappeared. Try not to over-mix as this could make your cake dry.

Pour equally into the lined tins and bake for 35-40 mins, checking that a knife comes out of the centre clean.

Leave to cool in the tins for 5 minutes before transferring to a wire rack to cool completely.


For the frosting//

With an electric hand mixer or cake mixer, mix your butter for a couple of minutes until it turns pale and fluffy.

Mix in your icing sugar 100g at a time.

Mix in your cocoa powder on a low setting so it doesn't poof* everywhere!

Mix in the vanilla and whipping cream a few tablespoons as a time.

*poof = technical term ;)


The Betty Stamp The Best Honeycomb Chocolate Cake Crunchie Recipe


Level the tops of the sponges with a leveller (I use this one) or a serrated knife.

On a turntable, add a small dollop of frosting in the centre and place the first sponge on top.

Pipe a circle of frosting around the outer circumference of the top of the sponge. Spoon a big dollop of jam into the middle of the circle and smear outwards towards the frosting.

Place the second sponge, levelled side down onto the jam/frosting.

Using about half of your frosting, crumb coat your cake and refrigerate for 10 minutes.

Using a cake spatula, (I use this one) add some more frosting to the side of your cake using gentle upward strokes.

Using a star shaped nozzle, pipe swirls around the top of your cake and place the honeycomb pieces onto the swirls :)

You're done! Phewf!


The Betty Stamp The Best Honeycomb Chocolate Cake Crunchie Recipe


It would probably be easier if I filmed a video to demonstrate this frosting technique. I did actually have a play with making one...but am too scared to post it!

I am by NO means a professional cake decorator and prefer a more rustic, messy approach to my bakes, but by gosh and golly they taste good! That's the main thing right?

Betty x

PS Did you see my Blueberry and Lemon Cake post? It was a corker.

Share:

Wednesday 20 March 2019

Creme Egg Mug Cake!

The Betty Stamp Creme Egg Easter Chocolate Mug Cake Recipe

Easter is fast approaching and I've actually gotten my act together this year to get some egg-themed bakes on the blog!

I've started out with a super simple but oh-so-scrumptious Creme Egg filled chocolate mug cake! And by gosh and golly, the ooey gooey centre is something quite special.

Stir all the ingredients into your favourite mug, bang it in the microwave and 1 minute later - out it pops!

The quickest & easiest dessert you'll ever make! (Probably).

It's a lot simpler than my Salted Caramel Mini Egg Millionaire Shortbread recipe, but those pieces of heaven are well worth all the caramel stirring!

I'll be in London with William for Easter this year, probably going Bouldering (our new favourite pastime), probably stuffing our faces with Maltesar Easter egg bunnies and probably cooking roast lamb with aaallll the trimmings for Sunday lunch.

How are you spending yours?


The Betty Stamp Creme Egg Easter Chocolate Mug Cake Recipe


What you'll need//

30g butter
2 tbsp caster sugar
half tsp vanilla extract
1 medium egg
4 level tbsp plain flour
half tsp baking powder
2 level tbsp cocoa powder
1 creme egg


The Betty Stamp Creme Egg Easter Chocolate Mug Cake Recipe


What to do//

Choose your favourite (microwave friendly) mug.

Melt the butter in the microwave.

Stir in the sugar, vanilla and egg.

Sift in the flour, baking powder and cocoa powder and stir until the flour has just disappeared.

Cut your creme egg in half and push one half down into the mixture and place one on top.

Pop in the microwave for 1 minute @ 800w.


The Betty Stamp Creme Egg Easter Chocolate Mug Cake Recipe


The Betty Stamp Creme Egg Easter Chocolate Mug Cake Recipe


Enjoy with a blob of ice cream!

Happy early Easter everyone :)

Betty x

Ps, are we instabuddies? If not, pop over and say hi!
Share:

Wednesday 6 March 2019

Blueberry and Lemon Cake


This majestic looking cake with a crown of blueberries has made my Monday, Tuesday and Wednesday. 

With a zesty, lemony sponge, dreamy buttercream frosting and fruity jam filling, it's a bit of a winner for any occasion.

I made this beauty for my friend's birthday and put on a bit of an indoor picnic spread complete with fresh tomato and mozzarella sticks, homemade creamy potato salad, mini bacon & chorizo muffins and avocado leafy salad. What a TREAT.

It was ALMOST warm enough to eat outside (I'm in London) but has turned more wintery again so we donned our wooliest jumpers to eat our treats inside with a cup of cwoffee.

We also recorded this video at the same time :) (shameless plug of my other life).

Anyway.....CAKE!!


What you'll need//

x3 6 inch round tins

300g unsalted butter (room temp)
300g caster sugar
6 eggs
zest of a whole lemon
2 tbsp lemon juice
300g self raising flour

for the frosting//
200g unsalted butter (room temp)
400g icing sugar
1 tsp lemon juice
half tsp vanilla bean paste (I use this one)

5-6 tbsp jam of choice
approx 25 blueberries


What to do//

Preheat the oven to 160 degrees (fan) and line x3 6 inch round tins with greaseproof paper.

Cream together your butter and sugar until a lovely pale colour.

Mix in your eggs, lemon zest and juice.

Sift in your flour and mix until the flour has disappeared, do not over mix the batter or your cake can become dry.

Pour equally into your tins and bake for 35-40 minutes depending on your oven. If a knife comes out clean, you're all good to go!

Leave in tins for 5 minutes before tipping onto a wire rack to completely cool.


For the frosting //

With an electric hand mixer, whip up the butter for a few minutes so it turns pale.

Sift in your icing sugar 200g at a time.

Add the lemon juice and mix.

If your frosting is too wet add more icing sugar, if too stiff add a bit more lemon juice.

Refrigerate until your cakes are completely cooled.

I piped a ring of frosting on the outer circumference of each cake and filled in the middle with jam. This is so the jam won't leak when you frost the outside of the cake!

Frost the whole of the cake and use a cake scraper (I use this one) to get a nice smooth finish. Plop the blueberries on top in a pretty pattern and that's you done for the day! Grab a glass of wine - you deserve it!


My friend's just launched this super fun range of mugs along with another for cat lovers! I took a few promo shots for him and they're over on my Instagram if you want to take a look :) 

This was the only photo I took of the inside of the cake, A) because I forgot to and B) because I got hungry...

So there you go - now you can see the jammy middle :)

Enjoy budding bakers!

Betty x
Share:
© The Betty Stamp | All rights reserved.
Blog Layout Created by pipdig